Efficiency is key when it comes to your home heating system. But even the most efficient systems need repair from time to time.
A rattling sound or strange odor can signal problems with your heater. The good news is that most of these issues can be fixed without the help of a professional. Click https://promastersheatingandair.com/ to learn more.
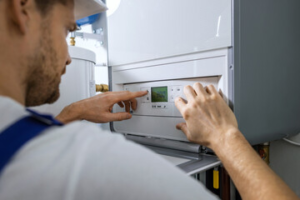
As a wear-and-tear item, your thermostat can start to malfunction over time. If your thermostat starts to show signs of wear, it’s important to check it regularly and fix it right away.
A faulty thermostat can lead to a variety of problems. It may stop working altogether, or it may be displaying inaccurate temperature readings. You can use a thermometer to test the accuracy of your thermostat. Place the thermometer in a room with your heating system running. If the readings are close, your thermostat is working properly. However, if the temperatures are different by more than 3 degrees, there’s likely a problem with your thermostat.
You should also keep an eye out for any erratic fluctuations in your energy costs. Big spikes in your utility bills are often a sign that your heating system is starting to wear out. It’s best to get this checked out by a professional.
Another important sign is if your thermostat’s display screen stops working. If the display screen is dim or completely dead, this could mean that the batteries are low or that the thermostat itself is experiencing a problem. In some cases, the problem with the thermostat is more serious, and you may need to replace it.
If you’ve been waking up in the middle of the night to adjust your thermostat, this is a bad sign. Abruptly changing the thermostat settings can cause your heater to work harder, which will wear it down faster and suck up more electricity.
If your thermostat is showing a yellow flame, this is a sign of carbon monoxide poisoning. Carbon monoxide is a colorless and odorless gas that can kill you if it builds up in your home. This is an urgent safety issue and should be fixed immediately by a qualified professional.
If you’re comfortable using a multimeter, you can try to troubleshoot your thermostat with one of these tools. First, make sure your thermostat is plugged in and turned on. Then, connect the leads of the multimeter to the terminals on the thermostat. The multimeter will read the current flow of electricity and tell you if your thermostat is functioning correctly.
The air conditioner drain line collects condensation that forms on the evaporator coil as it cools, then transports that water to an external drain. If this line gets clogged, the moisture can build up inside the air conditioner system and lead to issues like mildew and mold.
Your air conditioner has a P-trap in the condensate drain line to help trap sewer gases, but this isn’t always enough. If there is too much dust or debris in the air, it can find its way to the drain line and block up the entire system. A clogged condensate line can also provide the perfect home for spiders and other insects to move in and spin webs or lay eggs.
Depending on how clogged the drain line is, it may also stop your air conditioner from turning on at all. The float switch in the drain pan rises when it gets full, and once it does, it triggers a safety switch that disconnects power to the air conditioner unit. This will prevent the system from running even though your thermostat still instructs it to run cooling cycles – further cooling would add more water to the drain pan, possibly overflowing it and causing serious damage.
Clogged AC drain lines aren’t only a big problem for your air conditioning system, but they can also damage the interior of your house. Water that builds up in the system can cause severe moisture damage to walls, ceilings and other surfaces. Moisture can also encourage problems like mildew and mold, which can shorten the lifespan of your HVAC system.
To keep your AC drain line from becoming clogged, it’s important to inspect and clean it regularly. You can do this by pouring a cup of bleach down the drain line access pipe, which is typically located near your indoor air conditioning unit in an attic or crawl space. This will keep bacteria, mildew, and other contaminants from growing in the drain line before they start to clog it up. You can also ask your technician to clear your drain line and inspect it during a routine maintenance visit so it’s ready for the summer ahead of time.
A float switch is one of the smallest parts of your AC unit, but it performs an extremely important function. It detects when there’s an overflow of moisture in the drain pan and immediately shuts off the phase conversion process and creation of condensation. This feature prevents the moisture from causing water damage and protects your home’s indoor air quality.
If you have an older unit, it may not have a safety float switch, but these can be easily added to newer units. They are very affordable and easy to install, making them an excellent addition to any HVAC system.
Basically, the safety float switch contains a buoyant component that floats on the water in the drain pan. As the water level rises, the float rises and triggers the switch mechanism to break the electrical circuit, preventing the system from turning on when the air conditioner is running. This can help to save your home from costly water damage and protect your indoor air quality from dangerous mold and microbial growth.
The safety float switch also stops the excess water from flooding out of your home’s attic, which can be particularly damaging if the unit is located there like many are. Likewise, it can help to keep your home’s furnishing and valuables safe from damage.
It’s incredibly easy for homeowners to accidentally bump into and dislodge or break the float switch or something else around their HVAC system. This could then cause the system to keep tripping, which will eventually wear out the switch and cause the heat to stop working. Luckily, these switches are easy to reset by simply pushing the float down or pressing a reset button on the switch itself. However, it’s always a good idea to call an HVAC professional to make sure everything is properly adjusted and functioning correctly. They’ll also be able to ensure your AC unit is properly maintained to minimize problems in the future.
There are few things more frustrating than a pilot light that keeps going out, especially when you’re trying to take a shower or do some other task that requires hot water. Luckily, you can easily fix this problem by checking it yourself.
First, make sure the gas valve is completely shut off. Then, find the button that is labeled “reset” or look for the instructions for your model of furnace on the internet. Press the reset button and hold it while you use a long match or lighter to light the pilot flame. Keep holding the button until you see a blue flame, then let it go. Once you’ve done this, turn the knob back to the “on” position.
You might have a problem with air drafts if your pilot flame is flickering. To check, place your hand near the flame and feel for a breeze. If there isn’t one, it might be time to call a professional to install an HVAC duct system.
Another common reason your pilot light keeps going out is that the orifice is dirty. This can cause the flame to burn crooked and yellow, which triggers the thermocouple (a safety device that prevents the gas valve from opening if the pilot light goes out) to turn off the gas supply. Cleaning the pilot orifice can be as easy as using a wire brush or paper clip to clear away any debris and buildup, and blowing away any soot with compressed air.
A clogged pilot opening could also be the culprit if your pilot flame is weak or yellow, even after relighting it. The orifice can get blocked by dirt, so try using a fine-grain sandpaper to clean it out. There are also pilot orifice kits available that you can purchase from your local hardware store.
If you’ve tried relighting the pilot light and the flame is still yellow or weak, it might be a sign that your thermocouple needs to be replaced. This is a job for a trained professional and should be completed by an HVAC technician to ensure your home’s safety.